Materials Needed for Step 2:
Your 40 8" X 3" rectangles
Your 20 8" X 2 1/2" white or light coloured rectangles
Sewing Machine
Thread
Iron
Ironing Board
I am going to show you 2 different options for the block, the first one here you are using the same 2 fabrics on each side of the white strip.

The second option you can use 2 different fabrics on each side of the white strip.

I am choosing to use the first option, the same fabric on each side of the white strip.
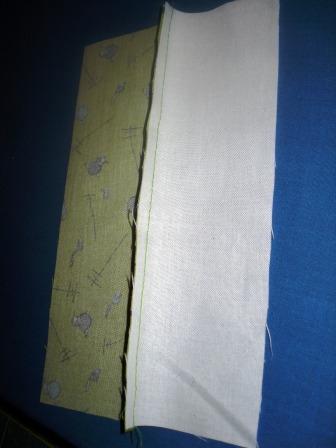
Now put one coloured strip and one white facing right sides together, then sew a 1/4" seam.

Now press your seam using the cotton setting on your sewing machine.

Now open your seam and face the right side down on your ironing board.
Then Press open your seam towards your coloured fabric.

Now turn it over and your seem should lay flat and be pressed all the way open. You should not be able to see any threads.

Now take the other coloured strip and face right side together with the white strip and sew a 1/4" seam.

Press your seam.

Press open your seam towards the coloured fabric.

This is what your block looks like upside down.

This is what your block will look like right side up! It is an 8" X 7.5" Block.

Now do this 19 more times to finish off all your blocks!
Please comment if you have any questions.
Stay tuned for the next step "quilt top"
Please forgive me if this is a stupid question; do you have to iron the seams after each time you sew or can you iron them after you have sewed all your blocks?
ReplyDeleteYou can do it all your seam pressing after. There is no need to press them as soon as you are done sewing. However, they do need to be pressed before we go on to the next step.
ReplyDelete