J & S Creationz Inspirationz

The inspiration on this blog is from my 2 young daughters Jenae and Shae-Lynn. They are the love of my life :)


Monday, February 28, 2011

Quilt Along.. Step 7

Step 7 - Binding

Material needed for step 7:
Sewing Machine
Binding Strips
Iron
Ironing Board

Sew your binding strips together with 1/4 " diagonal seams using with the right sides of your fabric facing eachother.


Press your seam open (see step 2 on how to press open seams)


Cut off a triangle so there is only about 1/4" fabric remaining after your seam.


Press your binding in half lengthwise with the wrong sides facing eachother.


Choose a middle spot on your quilt to start sewing on the binding, do not start on a corner.   Match all the raw edges together. 

Leave about a 10" tail of binding from the beginning point. Sew all layers together using a 1/4" seam.


When you get to a corner sew all the way to the end.


Lift up your foot and pull your quilt away and rotate it a quarter turn.


Fold your binding straight up, making a 40 degree angle.


Then bring your binding straight down and line up your raw edges and begin to sew again.


Sew your binding all the way around until you reach about 10" away from your beginning point. Then overlap your 2 dangling ends and cut the ends so that there is 2 1/2" of overlap between the 2 strips. (its 2 1/2 because that is the width of the binding, if your binding was 2" then the overlap would be 2")

Now open your binding and put your strips right sides together and pin in place.


Now sew a line across. Press open this seam and cutt off a triangle like you did when you sewed your strips together.


Your binding is now all connected and you can finish sewing it on your quilt. (sorry I don't have a picture, the picture didn't turn out.. I will take a picture on my next quilt and upload it here)

If you have any questions please comment here.

Stay tuned for the next step "binding finishing"

Quilt Along.. Step 6

Step 6 - Quilting

Materials needed for step 6:
Sewing Machine with free motion attachment
Thread
Measuring Tool/Straight Edge
Fabric Cutter

Change your foot on your sewing machine to your free motion attachment..


Place your basted quilt under your sewing machine, rolling the edge as you get closer to the center.


once you get your needle to the center start free hand quilting in a stipple pattern.  I like to use a large to medium size stipple.  I feel the more quilting your quilt has the stiffer it is, and I like my quilts nice and soft.


Once your are completely done quilting you will have to take your straight edge and fabric cutter and cut off the backing and batting so it is even with your quilt top.


And this is it so far :)


Please comment if you have any questions :)

Stay tuned for the next step "binding"

Sunday, February 27, 2011

Quilt Along.. Step 5

Step 5 - "Basting"

Materials needed for step 5:
Quilt top
Backing
Batting
Safety Pins
Tape

First Measure the length of your quilt top to determine the length of fabric you need to cut for your backing.  Cut your backing 2" longer than your quilt top. You do not need to measure the wide of the quilt top as the width of the fabric is the perfect size for this quilt. Iron out any wrinkes that are in your backing.


Once you cut your back fabric you should have some left over fabric to use for your binding.  Cut 4 2 1/2 X WOF (width of fabric) strips and set aside.. (note you will see that my backing and binding are not the same just pretend they are :))

For this quilt we only need  a crib size package of batting.  This is my favorite batting to use!


Measure and cut the batting to be the same size as your backing piece.


Lay out your back piece face down on the floor and tape all four courners.  Make sure there are no wrinkles and that it is pulled tight.


Then lay your batting on top of your backing and tape corners, again making sure there are no wrinkles.


Then lay your quilt top face up. 


Then using your safety pins start pinning!  I like to start in the corners and go around the boarders and then move my way in to the middle.


If you have any questions please comment :)

Stay tunned for the next step "quilting"

Quilt Along.. Step 4

Step 4 - "Boarder"

Materials Needed for Step 4
4 boarder strips
Patchwork quilt top
Sewing Machine
Thread
Iron
Ironing Board
Measuring Tool
Fabric Cutter

Sew the boarder to the longest sides of your quilt first.  Sew 1/4" seam with the right sides facing eachother.


Press your seams open towards the center of the quilt top, because of the light boarder you could possibly see through if the seam is towards the boarder.


Cut off the end of the boarder to be the same length as the quilt top.


Do that to both sides of the quilt, then do the same to the top and bottom.


This is the finnished quilt top..


Please comment if you have any questions!

Stay tuned for the next step "Basting"

Saturday, February 26, 2011

Quilt Along.. Step 3

Step 3 - "Quilt Top"

Materials Needed for step 3:
Your 20 Sewn and pressed blocks
Sewing Machine
Thread
Iron
Ironing Board
Measuring tool
Fabric Cutter

Lay your blocks out on the floor or any flat surface like you would like to sew them together. Ulternate the blocks going vertical and diagnal like the picture below.  The quilt will be 4 blocks by 5 blocks.


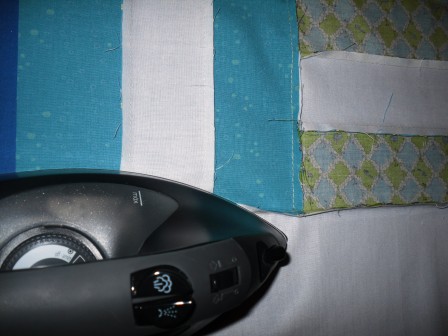
Sew your blocks in rows first.  Sew 1/4" seams with the right sides facing eachother.  Make sure the seams where you sewed your blocks together lay flate while you sew the two together, like in the picture below. Press open all your seams. (see step 2 on how to press seams)


Once you get all 4 blocks in your row sewn together take your measuring tool and your fabric cutter and make sure that you cut off any access fabric. The blocks your sew vertically will be a little longer than the blocks you sew horizontally so you will need to cut off about .5" to make it nice and even.


Once you have your 5 rows sewn you can sew your rows together.  Sew a 1/4" seam with the right sides facing eachother.  Again make sure your seams lay flate while you sew over them.  Press, and press open your seams.

Please comment if you have any questions!  I am sorry about the lighting in my pictures, I am doing this in my basement!

Stay tuned for the next step "Boarders"